Necessary tools required for the tutorial:
- Python → Just go to your command prompt and type
python -V(Capital V). When you hit enter, it will prompt you the latest version of python and make sure it saysPython 3.8.1. It is the latest version of Python for Windows (I literally downloaded it yesterday). If you have some other versions, just uninstall and download a new one. Just do it, I will let you know the reason later.
Now in the second case if you get a message something like this Python is not an internal or an external command. With no further due, take a deep breath and download Python from here.
Visual Studio Code → This is one of my favorite python code editors. Just download this to get a better programming experience with the rich features. Don’t worry, I’m not advertising (I wish I was). Anyway, one of the best things I like about the VS Code is that it has a built-in terminal. Every time if you want to install any external python libraries, you can use that built-in terminal to do the installation. You can skip a step of going to the command prompt. To download the Visual Studio Code, please use this link. If you get stuck somewhere, don’t worry, I got you. Follow the YouTube video to get a better understanding.
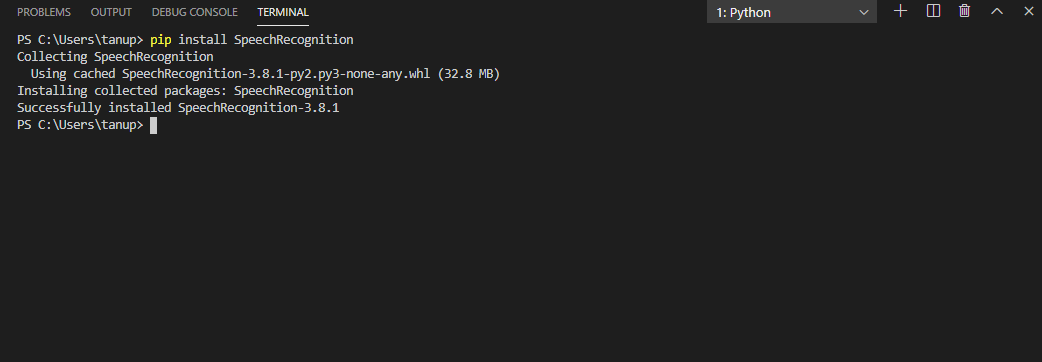
Speech Recognition library → Now that you have installed and spent some time with the IDE (Visual Studio Code). It’s time to install some libraries inside the Visual Studion Terminal. Just type
pip install SpeechRecognition. To read more about this library, the documentation is always available.

- PyAudio library→ Basically, it is a cross-platform audio/video library. Since we are dealing with the audio in this tutorial, we need to install it. Also, if we want to use our device’s microphone for input, then we need to install PyAudio. Now install the library might be tremendously hard. Especially if it is windows. Believe me, I have taken 5 straight hours installing it. Although it is not just typing,
pip install PyAudioin the command prompt. If you are lucky, then it might work but if you are unlucky individual like me, you will get an error message as shown below:

So I somehow discovered an alternate way to install the library. I could do this with the help of a YouTube video. Special thanks to the creator of this video. Please see the above video for a successful installation.
If you are not OK with watching a video, don’t worry I got you. Just follow the steps given down below:
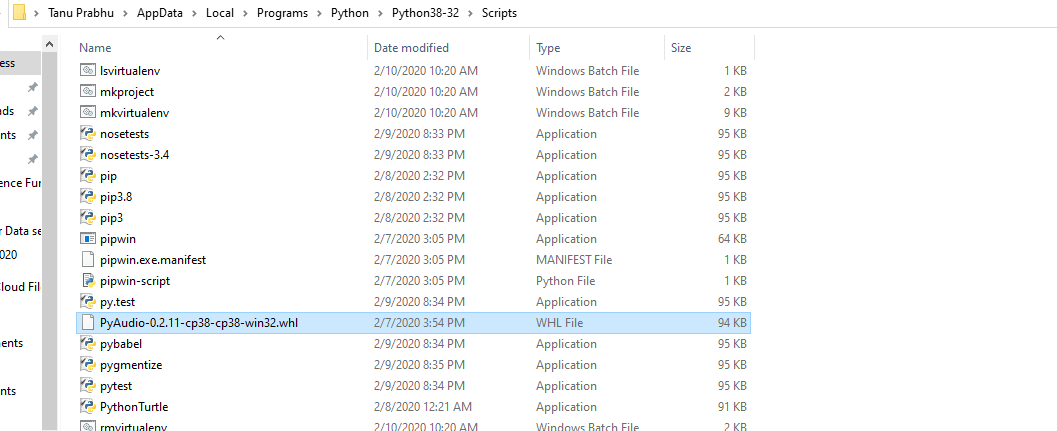
Download the PyAudio file from the “Unofficial Windows Binaries for Python Extension Packages”, thanks to Christoph Gohlke, Laboratory for Fluorescence Dynamics, University of California, Irvine. To access the link, just click here. Also, if your version of Python is something like 3.8.1 then download the file which has the name “PyAudio-0.2.11-cp38-cp38-win32.whl”. The second one from the top. But the whole point here is both the version of the PyAudio, and the Python must be the same.
Press “Run” below the search bar. Or ask Cortona or Google for help. Make sure you type
%appdata%in the run command prompt. It will look something like shown below:

- As soon as you click OK from the Run command prompt. It will redirect you inside the app data of your computer. I will look something like this.

Make sure you go back until you get “Local”, “LocalLow”, Roaming”. Click on Local.
- Click on *Programs → Python →Python 38–32 → Scripts →Paste the downloaded file (PyAudio)* inside the Scripts folder.
To summarize
C:\Users\tanup\AppData\Local\Programs\Python\Python38–32\Script (This is in my case).

- And this is an important step. Here you need to select the file and then get the path from the bar above as shown in the below:
![alt text] (https://miro.medium.com/max/1215/1*G0yu9p50QXDVsVyXm_BAvg.png)
Copy the above path we will need it in the below step.
- The last step and the easiest step now is to install the library manually. Now just to your command and type the below command.
pip install C:\Users\tanup\AppData\Local\Programs\Python\Python38–32\Scripts\PyAudio-0.2.11-cp38-cp38-win32.whl
pip install C:\Users\tanup\AppData\Local\Programs\Python\Python38–32\Scripts\PyAudio-0.2.11-cp38-cp38-win32.whl
Don’t freak out by seeing the command, it’s nothing but the pip install and the path where your PyAudio file is stored. Therefore, I told you to copy the path of the file.

So once you see the success message then congratulations you have successfully installed the library the hard way. If you want to double-check your successful installation. Then type IDLE in the below the windows search bar and then type import pyaudio. If you have successfully installed the library, then you will get no errors.

Its time to code now
Finally, its time for us to code
I would like to give the credits for the author of the code because I got the code from a GitHub Repository.
import speech_recognition as sr
r = sr.Recognizer()
with sr.Microphone() as source:
    print("Speak Anything :")
    audio = r.listen(source)
    try:
        text = r.recognize_google(audio)
        print("You said : {}".format(text))
    except:
        print("Sorry could not recognize what you said")
I will provide a brief explanation of the code:
Firstly import the library
speech_recognition.Then we need to recognize the speech. We need not write the recognizer function from scratch thanks to the library. All we need to do is with the help of
speech_recognizerinvoke a function calledRecognizer().There are so many methods for recognizing the speech from an audio source. Choose the one that fits your needs (Just Kidding). Just use the one I’m showing. Some of the most common methods are:
recognize_bing(): Microsoft Bing Speechrecognize_google(): Google Web Speechrecognize_google_cloud(): Google Cloud Speechrecognize_houndify(): Houndify Speechrecognize_ibm(): IMB Speechrecognize_wit(): Wit.ai Speech
In this tutorial, I will use the second method, i.e. recognize_google(). But make sure just executing this will cause an error because you need to provide an audio source. Now to get the audio source you have to listen to it right. Because the whole point is to listen to what the user says, and then display it. So in the code, so the method listen is used.
Once you have done, as shown above, the next step is to print the output. Meaning the system has listened to the user’s input, it should then display the output in a readable format.
Now last but not least. Executing the program is the only pending task. I bet if you have followed every line of this tutorial and all the installation process then you would not get any errors. But if you get any errors, you know what to do. Post it in the contacts section I’ll have a look and I shall look over it. If everything works, then let’s see the output.

Now I don’t know if you noticed this or not. The moment you executed this program at the bottom corner of your laptop’s display, the microphone icon would be enabled. Meaning that it’s listening (Isn’t is freaky). I would pop up when the program is executed, and then it disappears.

Now, this is not a great project or great invention, all we are doing is using the right libraries at the right time. Now, this is a good start for those who did not know that libraries can create wonders. Also, you have learned how to manually install a library. I hope you have enjoyed reading this tutorial. You learned something new today. Stay tuned for more updates. Until then, see you goodbye. Have a nice day.
