Copyright (c) Microsoft Corporation. All rights reserved.
Licensed under the MIT License.
Quickstart: Web Cam Object Detection
Object detection is the canonical computer vision task of determining where a specific object is in an image.
This notebook shows a simple example of loading a pretrained Faster R-CNN model for object detection from a webcam stream using the torchvision package.
To understand the basics of Object Detection, please visit our FAQ. For more details about the underlying technology of object detection tasks, including finetuning, please see our training introduction notebook.
Prerequisite for Webcam example
This notebook assumes you have a webcam connected to your machine. We use the ipywebrtc module to show the webcam widget in the notebook. Currently, the widget works on Chrome and Firefox. For more details about the widget, please visit ipywebrtc github or documentation.
Initialization
# Regular Python libraries
import io
import os
import sys
import time
import urllib.request
import matplotlib.pyplot as plt

# IPython
import scrapbook as sb
from ipywebrtc import CameraStream, ImageRecorder
from ipywidgets import HBox, Layout, widgets, Widget

# Image
from PIL import Image

# TorchVision
import torchvision
from torchvision import transforms as T

# utils_cv
sys.path.append("../../")
from utils_cv.common.data import data_path
from utils_cv.common.gpu import which_processor, is_windows
from utils_cv.detection.data import coco_labels
from utils_cv.detection.model import DetectionLearner
from utils_cv.detection.plot import PlotSettings, plot_boxes

# Change matplotlib backend so that plots are shown for windows
if is_windows():
    plt.switch_backend('TkAgg')

print(f"TorchVision: {torchvision.__version__}")
which_processor()
TorchVision: 0.4.0a0
Torch is using GPU: Tesla V100-PCIE-16GB
This shows your machine's GPUs (if it has any) and the computing device torch/torchvision is using.
%reload_ext autoreload
%autoreload 2
%matplotlib inline
Load Pretrained Model
We will start with a pretrained Faster R-CNN ResNet-50 FPN model which is a relatively small and fast CNN architecture. The reported box AP is 37.0 trained on the instances set of COCO train2017 and evaluated on COCO val2017. COCO is a popular dataset in the research community and consists of 330K images with more than 200K annotated objects of 91 distinct classes such as person, car, boat, or cup.
To speed up model inference we restrict processing to use at most an image resolution of 200 pixels, and only use up to 5 candidate object proposals per image.
model = torchvision.models.detection.fasterrcnn_resnet50_fpn(
    pretrained=True,
    rpn_pre_nms_top_n_test = 5,
    rpn_post_nms_top_n_test = 5,
    max_size=200,
)
Next, we just need to pass this model into our DetectionLearner object, and add the pre-defined coco-labels.
detector = DetectionLearner(
    model=model,
    labels=coco_labels()[1:],  # we use [1:] because the first element of the array is '__background__'
)
# Download an example image
IM_URL = "https://cvbp.blob.core.windows.net/public/images/cvbp_cup.jpg"
im_path = os.path.join(data_path(), "example.jpg")
urllib.request.urlretrieve(IM_URL, im_path)

im = Image.open(im_path)
im
Using the predict() method, we ask the model to detect how many objects and what they are on this image. In this case, the only object is "cup".
detections = detector.predict(im)
plot_boxes(im, detections["det_bboxes"], plot_settings=PlotSettings(rect_color=(0, 255, 0)))
detections
[{Bbox object: [left=61, top=59, right=273, bottom=244] | <cup> | label:47 | path:None} | score: 0.9996309280395508]
From WebCam Stream
Now, we use a WebCam stream for object detection. We use ipywebrtc to start a webcam and get the video stream which is sent to the notebook's widget. Note that Jupyter widgets are quite unstable - if the widget below does not show then see the "Troubleshooting" section in this FAQ for possible fixes.
# Webcam
w_cam = CameraStream(
    constraints={
        'facing_mode': 'user',
        'audio': False,
        'video': { 'width': 200, 'height': 200 }
    },
    layout=Layout(width='200px')
)
# Image recorder for taking a snapshot
w_imrecorder = ImageRecorder(stream=w_cam, layout=Layout(padding='0 0 0 50px'))
# Label widget to show our object detection results
w_im = widgets.Image(layout=Layout(width='200px'))

def detect_frame(_):
    """ Detect objects on an image snapshot by using a pretrained model
    """
    # Once capturing started, remove the capture widget since we don't need it anymore
    if w_imrecorder.layout.display != 'none':
        w_imrecorder.layout.display = 'none'

    try:
        # Get the image and convert to RGB
        im = Image.open(io.BytesIO(w_imrecorder.image.value)).convert('RGB')

        # Process the captured image
        detections = detector.predict(im)
        plot_boxes(im, detections["det_bboxes"], plot_settings=PlotSettings(rect_color=(0, 255, 0)))

        # Convert the processed image back into the image widget for display
        f = io.BytesIO()
        im.save(f, format='png')
        w_im.value = f.getvalue()

    except OSError:
        # If im_recorder doesn't have valid image data, skip it.
        pass

    # Taking the next snapshot programmatically
    w_imrecorder.recording = True

# Register detect_frame as a callback. Will be called whenever image.value changes.
w_imrecorder.image.observe(detect_frame, 'value')
# Show widgets
HBox([w_cam, w_imrecorder, w_im])
HBox(children=(CameraStream(constraints={'facing_mode': 'user', 'audio': False, 'video': {'width': 200, 'heigh…
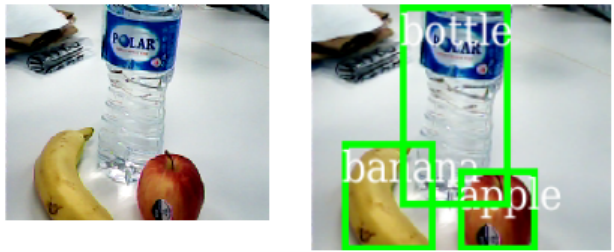
Now, click the capture button in the widget to start object detection. Labels and bounding boxes are displayed to show the most probable objects predicted by the model for an image snapshot.

Conclusion
In this notebook, we used a simple example to demonstrate how to use a pretrained model to detect objects on images. The model is limited to only predict object labels that are part of the COCO training samples. In the training introduction notebook, we will learn how to fine-tune a model on our own data.
# Stop the model and webcam
Widget.close_all()
# Preserve some of the notebook outputs
detections = [
    (x.label_idx, x.label_name, [(x.left, x.top), (x.right, x.bottom)])
    for x in detections["det_bboxes"]
]
sb.glue("detection_bounding_box", detections)