New to Plotly?
Plotly's Python library is free and open source! Get started by dowloading the client and reading the primer.
You can set up Plotly to work in online or offline mode, or in jupyter notebooks.
We also have a quick-reference cheatsheet (new!) to help you get started!
Version Check
Note: 2D Density Plots are available in version 2.0.0+
Run pip install plotly --upgrade to update your Plotly version
In [5]:
import plotly
plotly.__version__
Out[5]:
'2.0.2'
2D Histogram Contour Plot with Histogram Subplots
In [6]:
import plotly.plotly as py
import plotly.figure_factory as ff

import numpy as np

t = np.linspace(-1, 1.2, 2000)
x = (t**3) + (0.3 * np.random.randn(2000))
y = (t**6) + (0.3 * np.random.randn(2000))

colorscale = ['#7A4579', '#D56073', 'rgb(236,158,105)', (1, 1, 0.2), (0.98,0.98,0.98)]

fig = ff.create_2d_density(
    x, y, colorscale=colorscale,
    hist_color='rgb(255, 237, 222)', point_size=3
)

py.iplot(fig, filename='histogram_subplots')
Out[6]:
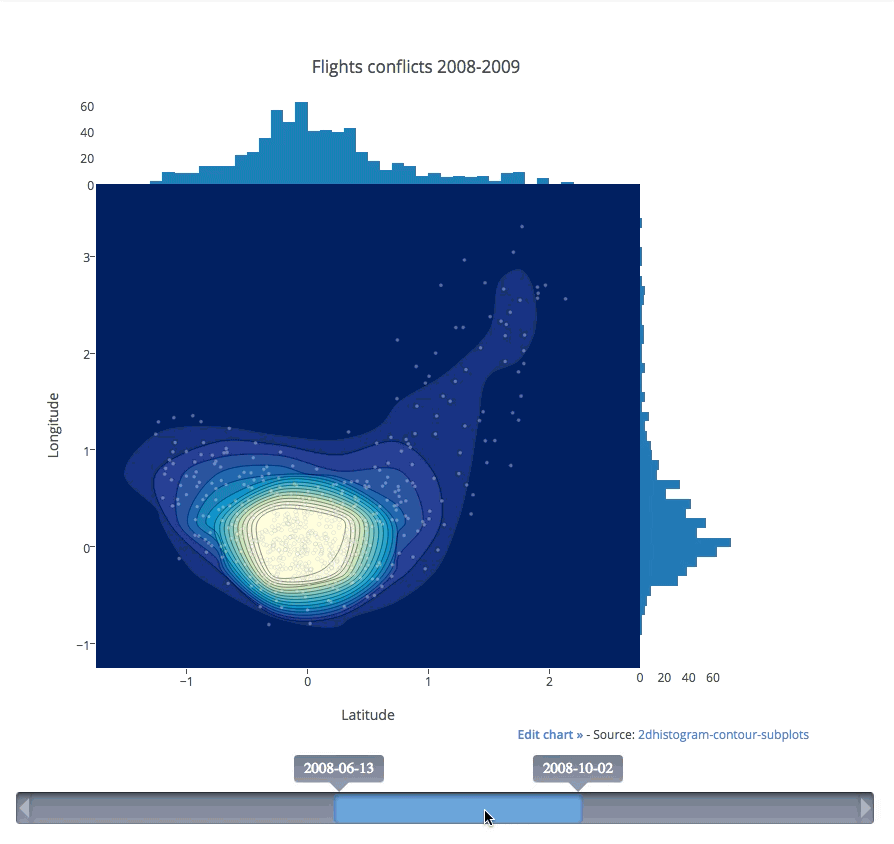
2D Histogram Contour Plot with Slider Control
Add slider controls to 2d-density-plot plots with the postMessage API.
See the code on JSFiddle.
Watch the 5 second video of how it works:
Reference
In [7]:
help(ff.create_2d_density)
Help on function create_2d_density in module plotly.figure_factory._2d_density:

create_2d_density(x, y, colorscale='Earth', ncontours=20, hist_color=(0, 0, 0.5), point_color=(0, 0, 0.5), point_size=2, title='2D Density Plot', height=600, width=600)
    Returns figure for a 2D density plot

    :param (list|array) x: x-axis data for plot generation
    :param (list|array) y: y-axis data for plot generation
    :param (str|tuple|list) colorscale: either a plotly scale name, an rgb
        or hex color, a color tuple or a list or tuple of colors. An rgb
        color is of the form 'rgb(x, y, z)' where x, y, z belong to the
        interval [0, 255] and a color tuple is a tuple of the form
        (a, b, c) where a, b and c belong to [0, 1]. If colormap is a
        list, it must contain the valid color types aforementioned as its
        members.
    :param (int) ncontours: the number of 2D contours to draw on the plot
    :param (str) hist_color: the color of the plotted histograms
    :param (str) point_color: the color of the scatter points
    :param (str) point_size: the color of the scatter points
    :param (str) title: set the title for the plot
    :param (float) height: the height of the chart
    :param (float) width: the width of the chart

    Example 1: Simple 2D Density Plot
    ```
    import plotly.plotly as py
    from plotly.figure_factory create_2d_density

    import numpy as np

    # Make data points
    t = np.linspace(-1,1.2,2000)
    x = (t**3)+(0.3*np.random.randn(2000))
    y = (t**6)+(0.3*np.random.randn(2000))

    # Create a figure
    fig = create_2D_density(x, y)

    # Plot the data
    py.iplot(fig, filename='simple-2d-density')
    ```

    Example 2: Using Parameters
    ```
    import plotly.plotly as py
    from plotly.figure_factory create_2d_density

    import numpy as np

    # Make data points
    t = np.linspace(-1,1.2,2000)
    x = (t**3)+(0.3*np.random.randn(2000))
    y = (t**6)+(0.3*np.random.randn(2000))

    # Create custom colorscale
    colorscale = ['#7A4579', '#D56073', 'rgb(236,158,105)',
                  (1, 1, 0.2), (0.98,0.98,0.98)]

    # Create a figure
    fig = create_2D_density(
        x, y, colorscale=colorscale,
        hist_color='rgb(255, 237, 222)', point_size=3)

    # Plot the data
    py.iplot(fig, filename='use-parameters')
    ```
In [11]:
from IPython.display import display, HTML

display(HTML('<link href="//fonts.googleapis.com/css?family=Open+Sans:600,400,300,200|Inconsolata|Ubuntu+Mono:400,700" rel="stylesheet" type="text/css" />'))
display(HTML('<link rel="stylesheet" type="text/css" href="http://help.plot.ly/documentation/all_static/css/ipython-notebook-custom.css">'))

! pip install git+https://github.com/plotly/publisher.git --upgrade
import publisher
publisher.publish(
    'density-plots.ipynb', 'python/density-plots/', 'Python 2d Density Plots | plotly',
    'How to make a 2d density plot in python. Examples of density plots with kernel density estimations, custom color-scales, and smoothing.',
    title='Python 2d Density Plots | plotly',
    name='2d Density Plots',
    thumbnail='thumbnail/density.gif', language='python',
    has_thumbnail='true', display_as='statistical', order=7,
    ipynb= '~notebook_demo/25')
In [ ]: