Reading An Image In Python (Without Using Special Libraries)
Just say goodbye to OpenCV, Matplotlib, PIL except for Numpy!

Well, the above picture is splendid, isn’t it?. It’s a masterpiece to me. Nonetheless, have you ever thought or asked yourself this one million dollar question:
*What is an image made up of?*
Now, before reading this entire tutorial, I want you guys to answer this question in the comment section, in that way you can give some work to your brain. Anyway, for those of you never answered the question or didn’t know the answer, by reading this article you can finally answer the question with no hesitation. Enough of this hype, let’s get started!
Story

I was given an assignment in my Image Processing Class (Graduate), where I had to read a raw image from a file resize that image to the specified dimensions using single point re-sampling and weighted average re-sampling algorithms. There was a note given to me saying “*Don’t use any external libraries*” for your programs especially for reading and saving the image. Only selected algorithms were allowed to use one such in python was numpy. This was very painful to hear, but anyway I had to do it and I did it. In this tutorial, we will only focus on reading and saving the image and nothing fancy.
Question
Write a program that reads a grayscale image in raw format from a file, and save the new image into a new file in raw format. (I just made the question short because this is what you will learn today).
Image Source
Below is the source for the greyscale 8-bit image. I will be using the *4th* sample image “Barbara, 8 bit gray (512 x 512). raw”. The link for other sample images can be found here.
Usage of libraries
As I said, I will not be using any special libraries of python. Some of the most trending and widely used libraries in the field of Image Processing are:
The fun part here is just by using *OpenCV, PIL, and Matplotlib* libraries we can read and save the image to a file in just two lines of code. But the catch here is not to use special libraries and special methods. *Numpy* is the only standard library that will be used throughout (*you will know why*).
# Necessary library used for this tutorial
import numpy as np
Initializing rows and column values for the image
The dimension of the image is made up of rows and columns.
# For example a particular image in this case would contain (512*512) rows and columns meaning 262,144 pixels
ROWS = 512
COLS =  512
# Different images have different dimensions. Change it accordingly
Opening the input image file (RAW format)
# Opening the input image (RAW)
fin = open('barbara_gray.raw')
print(fin)
<_io.TextIOWrapper name='barbara_gray.raw' mode='r' encoding='UTF-8'>
Now, we need to construct a 2D array from the raw data (image). A highly efficient way of reading binary data with a know data-type must be used, this can be done with the help of the numpy library.
Loading the input image
This is where the actual fun starts. Thanks to numpy
# Loading the input image
print("... Load input image")
img = np.fromfile(fin, dtype = np.uint8, count = ROWS * COLS)
print("Dimension of the old image array: ", img.ndim)
print("Size of the old image array: ", img.size)
... Load input image
Dimension of the old image array:  1
Size of the old image array:  262144
Conversion from 1D to a 2D array
There is one way that we can convert the 1D array to 2D array such as floor dividing the total number of pixels with rows and columns of the image or columns and columns (either is fine). This can be written with the help of a formula :
img = tp // (cols, cols)
*tp* = total pixels; *cols* represent rows and columns of the image. The reason we are using floor division rather than division because we need to round off the values as a whole number.
# Conversion from 1D to 2D array
img.shape = (img.size // COLS, COLS)
print("New dimension of the array:", img.ndim)
print("----------------------------------------------------")
print(" The 2D array of the original image is: \n", img)
print("----------------------------------------------------")
print("The shape of the original image array is: ", img.shape)
New dimension of the array: 2
----------------------------------------------------
 The 2D array of the original image is:
 [[220 229 230 ... 107 106  91]
 [206 228 229 ...  94  97  97]
 [212 227 226 ...  84  97 100]
 ...
 [ 75  62  72 ...  34  43  30]
 [ 34  50  60 ...  35  29  37]
 [ 49  47  62 ...  43  30  29]]
----------------------------------------------------
The shape of the original image array is:  (512, 512)
Saving the new image into a new file in a raw format
# Save the output image
print("... Save the output image")
img.astype('int8').tofile('NewImage.raw')
print("... File successfully saved")
# Closing the file
fin.close()
... Save the output image
... File successfully saved
*Note: While entering the rows* and *columns* of the image. For example if the resolution of an image is *1600x1000, then it means the width* is *1600* and the *height* is *1000. Similarly in the above program the rows* would be *1000* and the *columns* would be *1600*.
Output
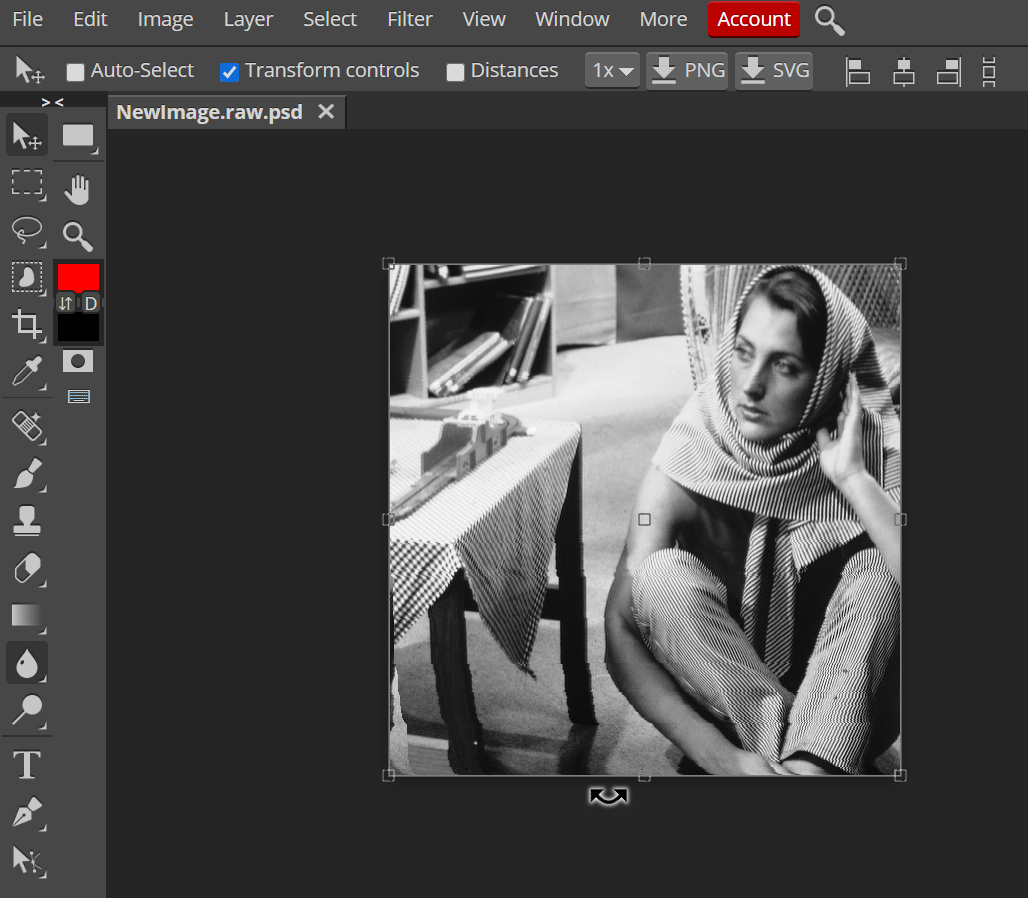
On successfully executing the above code you are now able to read the raw image, and then save the raw image. Yay!!!. Now if you don’t believe me you can open the saved image using some online image opener tool (or whatever). I normally use photopea, and this is what I get.

Just a heads up, above is the screenshot of the output along with the tool, the main output image is the greyscale called *“Barbara”* (a woman who has her one hand raised or whatever).
Conclusion
Before leaving, try reading images with other formats such as JPEG (JPG), PNG, and see what values you get. Also, try reading a color (RGB) image. Anyway, now you can easily answer the above question at the beginning of the tutorial. Let me remind you again. “*What is the image made up of?”. The answer is as you all saw, “The image is made up of an array of pixel values*”. The number of values depends on the rows and columns of the given image.
That’s all it for today, I hope you guys enjoyed reading the tutorial “*Reading An Image In Python (Without Using Special Libraries)*”. As promised I did not use any other libraries apart from numpy. Well, duh! you need to use numpy to handle arrays. If you guys have any comments or concerns about the tutorial, then let me know in the comment section below. Until then goodbye, stay safe:)