Introduction
Google Colab is an amazing tool that lets us build and execute an outstanding data science model and provides us with an opportunity to document our journey. As Google Colab provides us code cells to type the code, it also provides us with text cells to add the text. In this tutorial, we will focus more on the text cell and see how we can master it by using some simple commands that I will discuss in this tutorial. If you love documenting (like me) then you will enjoy reading this tutorial. You can start exploring Google Colab from below given link. Believe me, it’s an amazing tool.
Get your hands on Google Colab
Cheat-sheet
Below I will discuss some main handy tricks and shortcuts that can use and become a pro in documenting. If you know Markdown, XML, and HTML coding then this might be a cakewalk or if you are not familiar with either of those well today is the day to learn them all. Google Colab supports both Markdown and HTML documentation. You can any of these to document. All right, let’s get started.
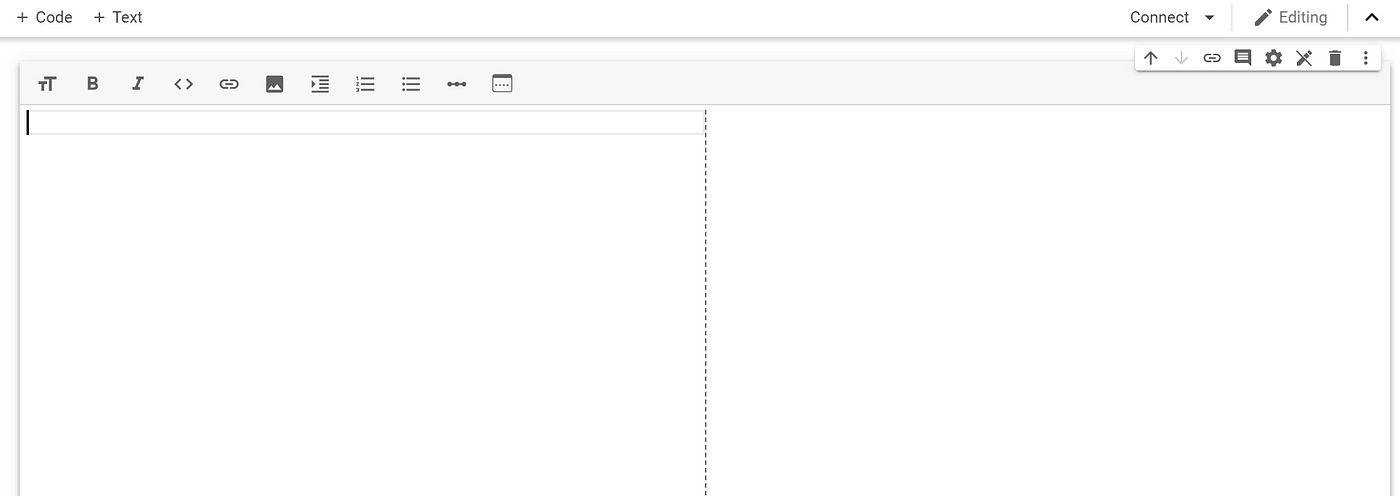
To experiment with all of these commands use the “Text cell”
Heading
Below is the shortcut command for headings. There are different types of headings from Heading 1 to 6.
Markdown
Use # heading-name, the more you append # the size of the heading decreases as seen below:

HTML
Similarly, you can use HTML tags such as h1, h2, h3, h4, h5 and h6 for headings as shown below:

Lists
As we all know there are two types of lists:
Ordered List
Unordered List
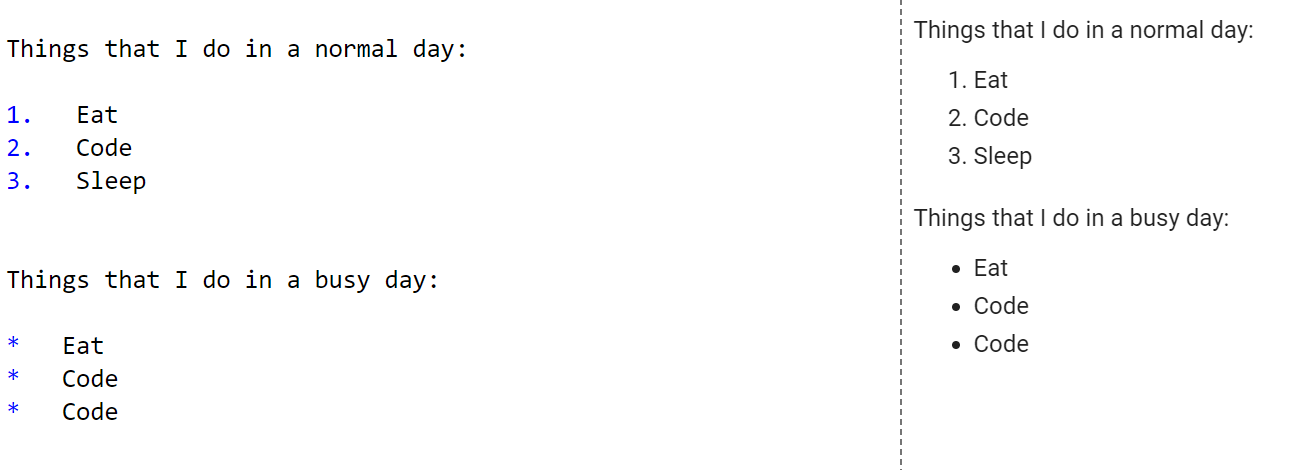
As the name suggests an ordered list has an order (1, 2, 3,… or other). But an unordered list has no order, as shown below.
Ordered and Unordered list in Markdown
In markdown for the ordered list, you can straightaway just type numbers like 1, 2, 3, and so on. But for the unordered list, you can start with a * and this intern creates a bullet list.
HTML
We can use the HTML tags to play with the lists as shown below:
Ordered list
In the ordered list there are normal list, type 1, A, a, I, i types as shown below:
Normal list
Use the ol tag and for the list contents use the li tag as shown below:

Type = “1”
Just add type = "1" inside the ol tag this will create an ordered list of 1, 2, 3, and so on. The list items will be numbered with numbers (default).

Type = “A”
Just add type = "A" inside the ol tag this will create an ordered list of A, B, C, and so on. The list items will be numbered with uppercase letters.

Type = “a”
Just add type = "a" inside the ol tag this will create an ordered list of a, b, c, and so on. The list items will be numbered with lowercase letters.

Type = “I”
Just add type = "I" inside the ol tag this will create an ordered list of I, II, III, and so on. The list items will be numbered with uppercase roman numbers.

Type = “i”
Just add type = "i" inside the ol tag this will create an ordered list of i, ii, iii, and so on. The list items will be numbered with lowercase roman numbers.

Unordered list
In the ordered list there are normal list, disc, square, circle, and none types as shown below:
Normal list
Use the ul tag and for the list contents use the li tag as shown below:

Disc
Just add type = "disc" inside the ul tag to create a disc-shaped list.

Circle
Just add type = "circle" inside the ul tag to create a circle-shaped list.

Square
Just add type = "square" inside the ul tag to create a square-shaped list.

None
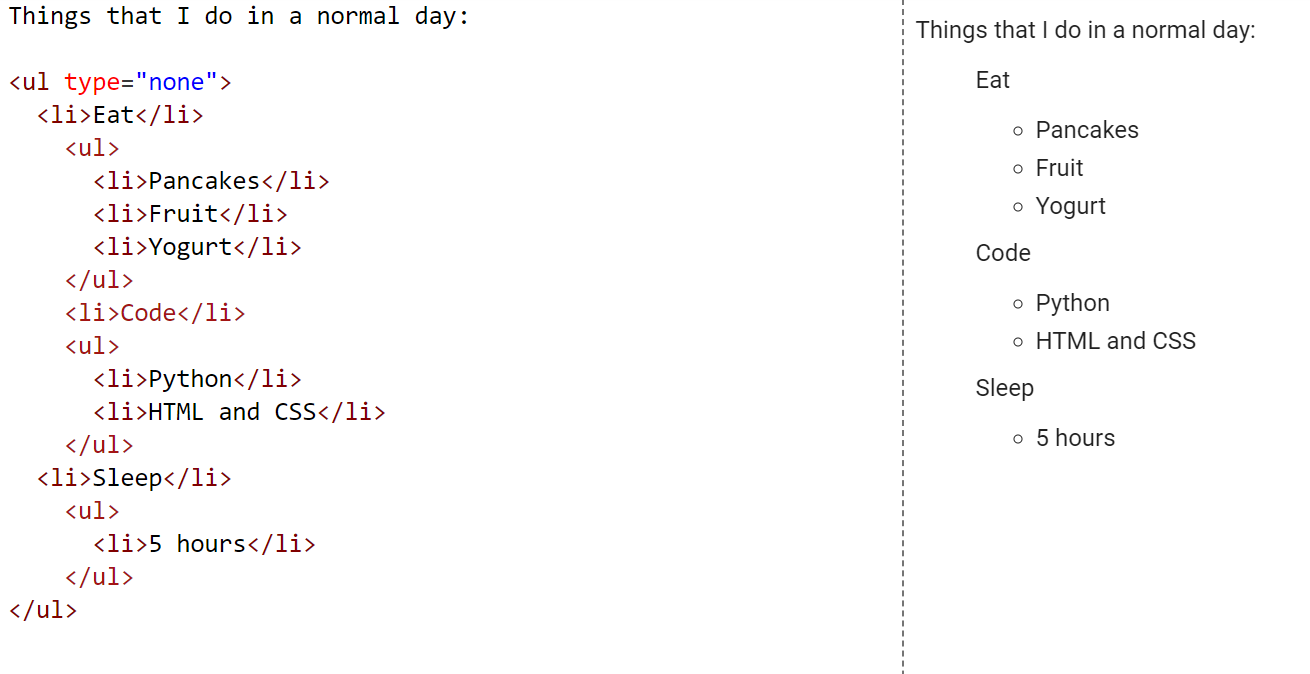
Just add type = "none" inside the ul tag to create a none-shaped list. In this case, the list will have no points as shown below:

Description list
A description list is a list of terms, with a description of each term. The dl tag consists dt which defines the name of the list and the dd tag describes each list.

Nested list
Nested lists are basically lists within lists.
Control list counting
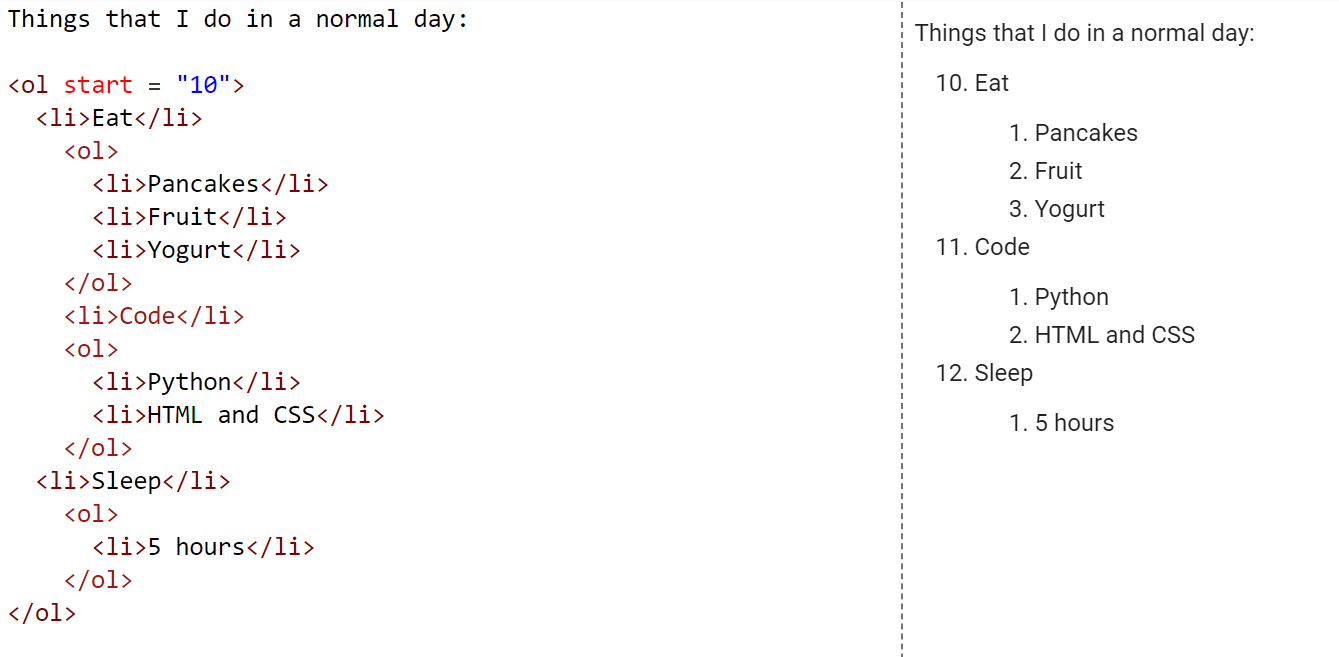
An ordered list will start counting from 1. If you want to count from a specified number, you can use the start attribute as shown below:
To know more in-depth about the list in HTML please refer to the article below:
Links
Links or hyperlinks allow users to click their way from page to page.
Markdown
In markdown write the title of the link inside square brackets [ ] and write the webpage address inside round brackets or parenthesis ( ). Make sure you write the title first, followed by the link.

HTML
In HTML for the hyperlinks, you can use the anchor a and href tag as shown below:

Images
Sometimes one image is worth one thousand words. People can easily understand the concepts better by seeing an image.
Markdown
Similar to the link you need to insert the link of the image inside the parenthesis. Make sure you append ! at the beginning. If your link is broken or not valid, then the alt text would be displayed.

Image hover
You can simultaneously hover on the text to see the title of the image. To do this, you can put the text of your choice inside the command as shown below:

HTML
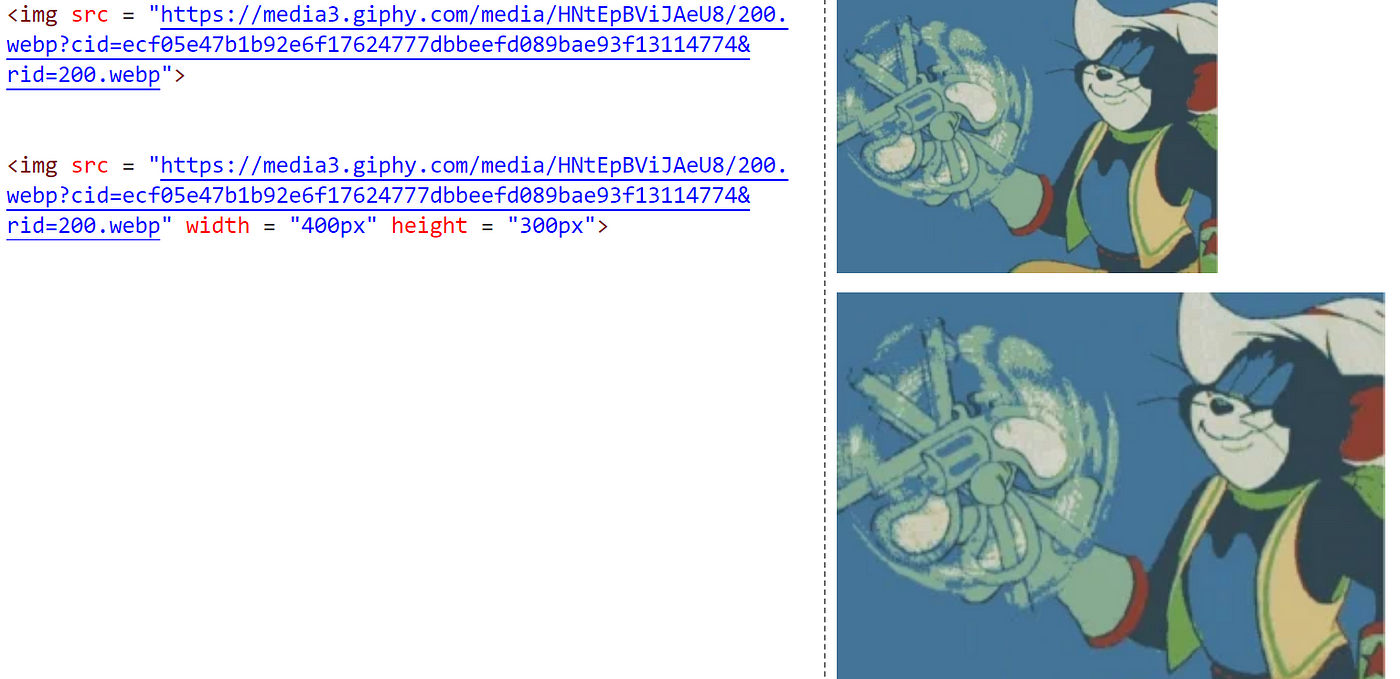
In HTML we can include an image using the img tag and you need to provide the source of the image to the src tag.
Adjusting height and width
You can adjust the height and width of the image. Also, you can embed a GIF image too as shown below.
Images along with captions
It’s a great practice to give credit to the images taken from different sources (I mean citing the images or providing the captions). With the help of figcaption tag we can provide captions to the images.

You can play with the align tag and try to align the caption according to your preference.
Format the code
There are two things that you need to understand here are:
- Inline Code
- Syntax highlighting
Inline Code
Sometimes you might want to insert a few code samples you can use Inline codes. To use the inline code, you can use the backticks (``). Surround it with backticks as shown above.

Syntax highlighting
This is used when you write huge lines of codes inside Google Colab’s text editor. Sometimes including huge python code snippets is not a good idea using inline codes, use syntax highlight in this case. You must embed the code within ``` as shown below:
Default syntax highlighting
This works irrespective of any programming language.

Python syntax highlighting
This can be used explicitly for python programming. You should include the name python at the beginning.

Javascript syntax highlighting
This can be used explicitly for JavaScript programming. You should include the name javascript at the beginning.

C programming syntax highlighting
This can be used explicitly for C programming. You should include the name c at the beginning.

As seen above you can highlight the code snippets based on different programming languages.
Tables
There are a few times you might want to represent the information in the form of tables.
Markdown
You must use the | as an operator for different columns. By default, the table headers would be in bold.

Colons can be used to align columns.
If you need to create any table then use the below tool to generate tables for you. All you have to do select the type of table generators such as Latex, HTML, Markdown, and others. Enter the contents inside the table and then click on Generate. You can then copy-paste the generated code in the text editor and see a beautiful table without minimum effort.
HTML
In the case of HTML, you must use the table tag along with tr which is for the table rows and th is for the table headers (Company Name and Founder) in this case. The td is for the table description.
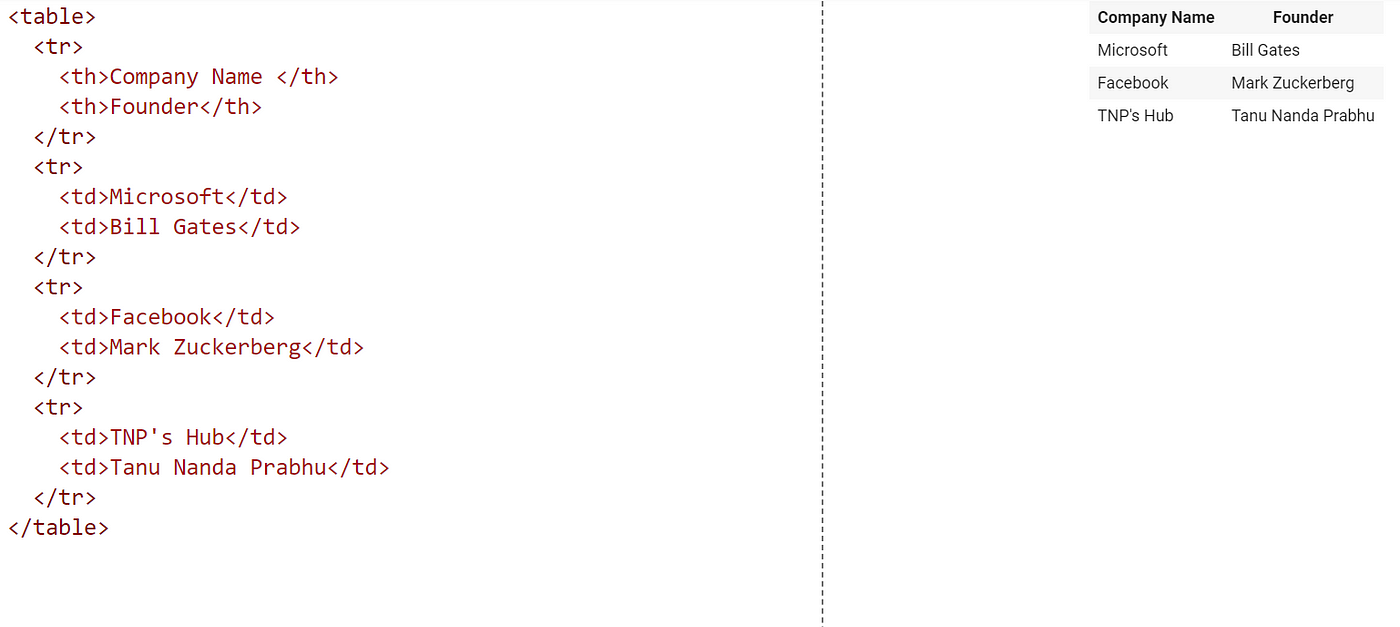
You can also use the align tag and align the contents accordingly.
Horizontal Ruler
It is often a wonderful practice to draw a horizontal ruler after every chapter, or any concept while you are writing. This just helps in differentiating things from one another.
Markdown
In case of markdown, you need to just use 3 --- (Minus).

HTML
In case of HTML, you need to use the tag hr for inserting a horizontal ruler.

Justify
Often many times you will write big paragraphs in your notebooks, but sometimes you might want to justify them just to make it look neat. Here, you can use the align tag with justify as a value.


Similarly, you can use right, left, and center values and align the paragraph accordingly.
Line break
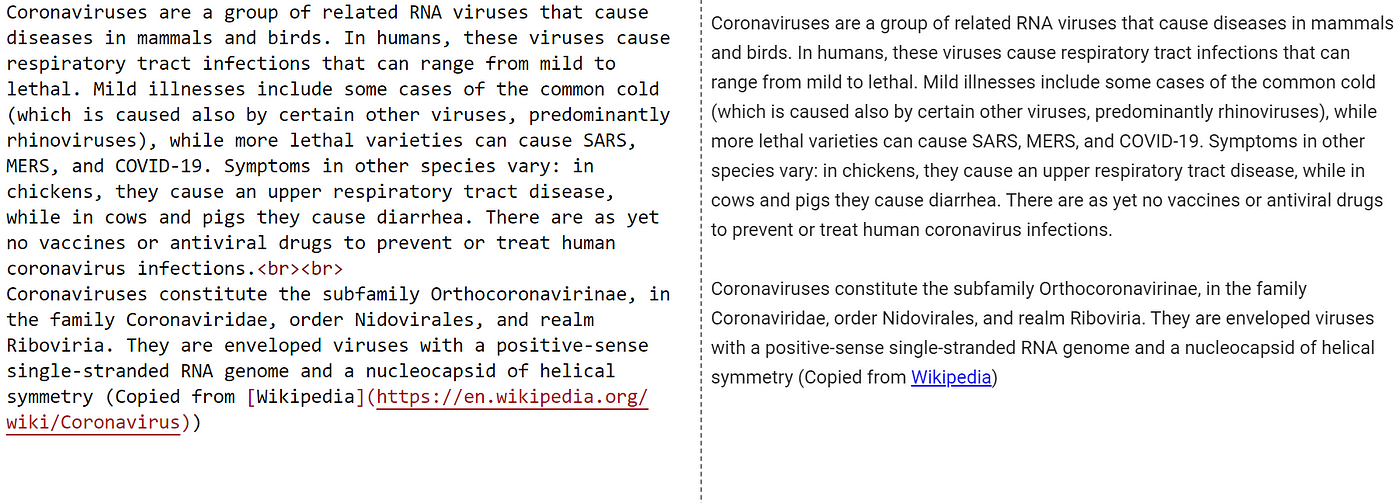
Some times you might want to start a new paragraph, so you will need to put a line break in between both of them. There are two options here either you can just press the “Enter” key and leave a line of space in the between or you can use the br tag also called a line break.
Mathematical formulas
If you are using the notebooks for research purpose then you need to write a lot of equations and mathematical symbols.
Symbols
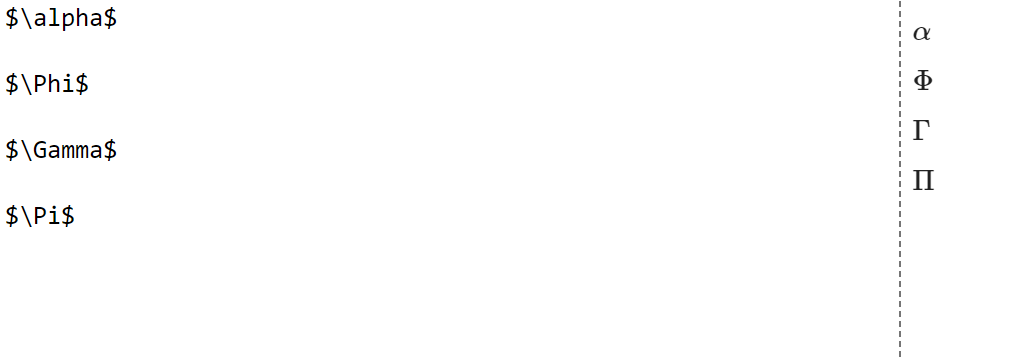
Make sure you write the symbol name between $ and start with \ after the first $.
Equations
Follow the same rules i.e surround the equations between $ and start with / after the first $.
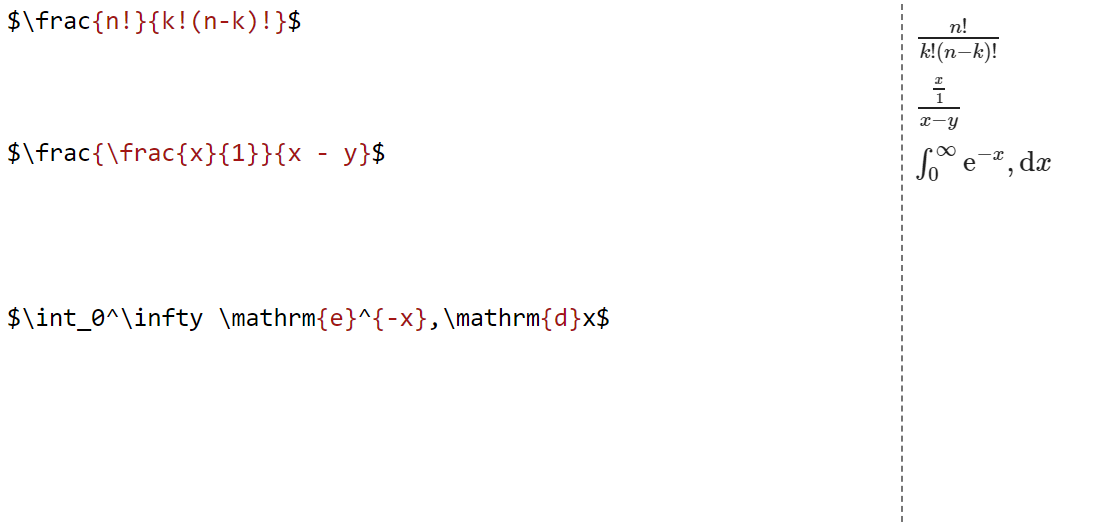
To see more about the mathematical equations and symbols, please refer to the link below:
Writing Mathematical Formulas in Markdown
All right, folks, that’s the end of the tutorial. I hope you learned many new things today. I tried to keep this tutorial short but as there were many concepts I had to maximize it. But this cheat-sheet will be useful in most of the interviews (technical documentation) or when you are documenting your Jupiter notebooks. If I find more tips and tricks, then I will provide the details here. Until then, stay safe and have a wonderful day. See you next time.
